In the aerospace sector, even the tiniest defect poses enormous risks. Be it microcracks within a turbine blade or voids within a composite fuselage panel, surreptitious flaws can compromise safety, a brand’s performance, and regulation certification. Thus, aerospace manufacturing quality control is not simply about compliance; it is about failure prevention in the most demanding and highly scrutinized environments.
Standard inspection techniques such as visual and ultrasonic evaluations are limited to the detection of surface and some subsurface anomalies. These methods would not provide insight into complex internal structures. In these cases, X-ray inspection and CT (Computed Tomography) scanning are crucial. These techniques are a form of non-destructive testing (NDT) and, as such, they permit manufacturers to assess aerospace components’ internal structures in detail without causing harm. X-ray technology is now a cornerstone of aerospace QA, helping manufacturers and MROs (Maintenance, Repair, and Overhaul providers) maintain rigorous safety, traceability, and compliance standards.
Table of Contents

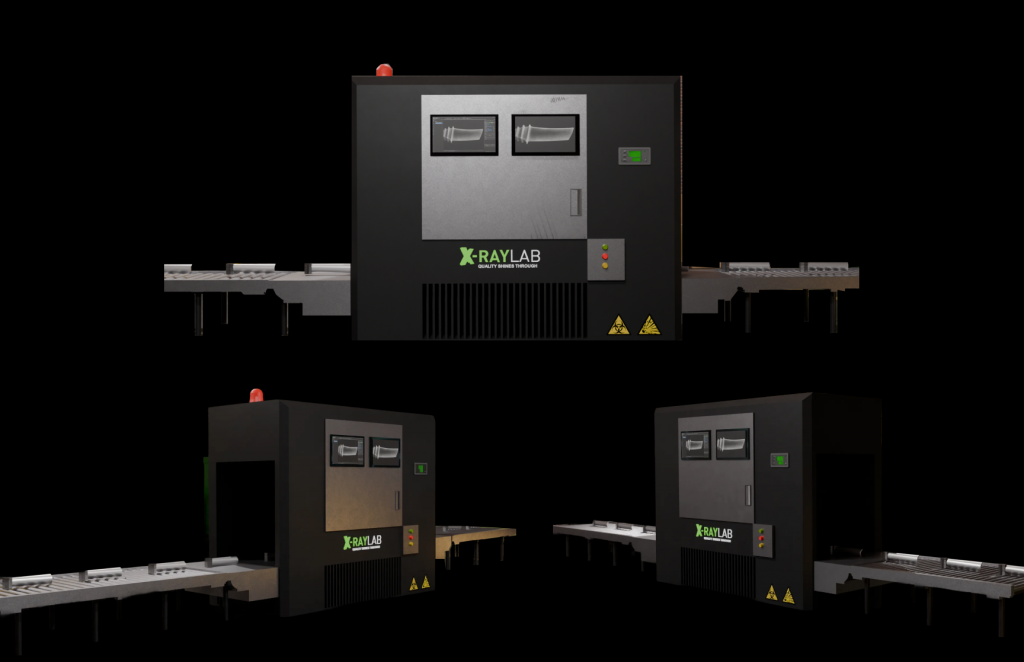
Real-time X-ray inspection of turbine blades on the production line, ensuring defect-free aerospace components.
Hidden Defects in Aerospace Components Found by X-Ray
Aerospace components, whether machined, cast, 3D printed, or bonded, are vulnerable to internal defects that often cannot be seen from the outside. These defects can form during various stages of production and pose a serious risk to structural integrity, fatigue resistance, and safety in high-performance environments.
Common internal defects detectable by X-ray inspection include:
- Porosity: Small air pockets or voids trapped during casting or additive manufacturing
- Shrinkage cavities: Larger internal voids caused by uneven cooling in metal parts
- Inclusions: Foreign materials (e.g., slag, oxide) trapped inside metal components
- Delamination: Layer separation in composite materials, especially carbon fiber parts
- Incomplete weld fusion: Gaps or lack of bonding between welded surfaces
- Microcracks: Tiny cracks that form under stress or heat, especially in turbine blades
- Unbonded interfaces: Voids between dissimilar materials (e.g., metal-composite joints)
These flaws can significantly weaken the part, reduce fatigue life, and compromise performance under high load or extreme thermal conditions.
How X-Ray and CT Improve Aerospace NDT
X-ray inspection and CT scanning are both non-destructive imaging methods that allow inspectors to see inside components without cutting, grinding, or otherwise damaging them. In 2D X-ray imaging, a flat projection is captured, often used for quick checks or production-line evaluations. In contrast, CT scanning reconstructs the object in 3D, producing detailed cross-sectional slices and enabling volumetric analysis.
What sets these techniques apart in aerospace is their precision and flexibility. With resolution down to microns, CT scans can identify cracks or inclusions that are completely invisible to the naked eye. In addition, contemporary X-ray systems have the capability to assess multi-material components, like metal-composite assemblies, in a singular scan.
X-ray and CT scans, in contrast to ultrasound testing which relies on operator dependent surface coupling and interpretation, provide digital, high-resolution, and repeatable results. They are of relevance to components with highly intricate geometrical features such as the lattice structures of 3D-printed parts or the internal cooling channels of jet engines, which pose significant challenges for traditional inspection techniques.
X-Ray at Every Stage of Aerospace Manufacturing
Inspection by means of X-ray and CT scans starts before production and continues throughout the entire manufacture of the item, as regards quality assurance.
Verification of materials received: Before the machining process is performed, the raw materials can be checked to ensure there are no defects of any kind.
Checks during the process: During the processes of additive manufacturing and welding, real-time X-ray checks can be performed to detect and correct mistakes immediately.
Final quality assurance: Before issuing the component, it can be scanned entirely in 2D and 3D to ensure accuracy in comparison to the design as well as precision in constituent parts.
Failure analysis: In the unfortunate circumstance of part failure in flight or during testing, the part can be CT scanned to expose the failure without destruction of the component, thus preserving the evidence.
The increased precision at each level for the aerospace Original Equipment Manufacturers OEMs and suppliers stems from the X-ray inspections which, in turn, reduce the scrap rates, reworks, and production timelines.
Conclusion
The increasing complexity of aerospace parts which utilize advanced composite structures, additive manufacturing, and rigorous tolerances heightens the demands on quality control. X-ray inspection and CT scanning enable engineers and manufacturers to detect hidden flaws, maintain compliance, and ensure the integrity of critical parts, without slowing down production or compromising performance.
At XRAY-LAB, we specialize in advanced NDT solutions tailored for aerospace applications. Whether you’re manufacturing high-performance components or conducting post-failure analysis, our imaging services are built to meet the highest standards. Contact us today to learn how we can support your mission with precision and reliability, from the inside out.
XRAY-LAB delivers advanced X-ray and CT inspection services for non-destructive quality control across industries. Our high-resolution imaging detects internal flaws, validates dimensions, and ensures compliance. Trusted by manufacturers worldwide, we provide fast, reliable, and traceable results. Explore our services or contact us.
Frequently Asked Questions
Why Is CT Scanning Preferred Over Ultrasonic Testing in Aerospace Component Inspection?
CT scanning is preferred for its ability to generate full 3D internal visualizations of complex geometries, like honeycomb structures, turbine blades, and composite layers—without the need for surface contact or coupling gels. CT offers volumetric imaging, which allows for more precise defect detection and dimensional validation in a single scan, whereas ultrasonic testing offers point-by-point data. For crucial aerospace components where internal defects and geometrical deviations need to be evaluated jointly, this makes it perfect.
Can X-Ray Systems Be Used for Real-Time Quality Control During Aerospace Part Production?
Yes. To identify defects like porosity, cracks, or incomplete fusion as they appear, sophisticated real-time X-ray systems can be incorporated into welding or additive manufacturing procedures. This enables producers to reduce material waste, modify process parameters, and instantly stop production. To help achieve strict tolerances and zero-defect objectives, real-time CT or radioscopic inspection is utilised in certain aerospace applications during automated welding or process monitoring.

